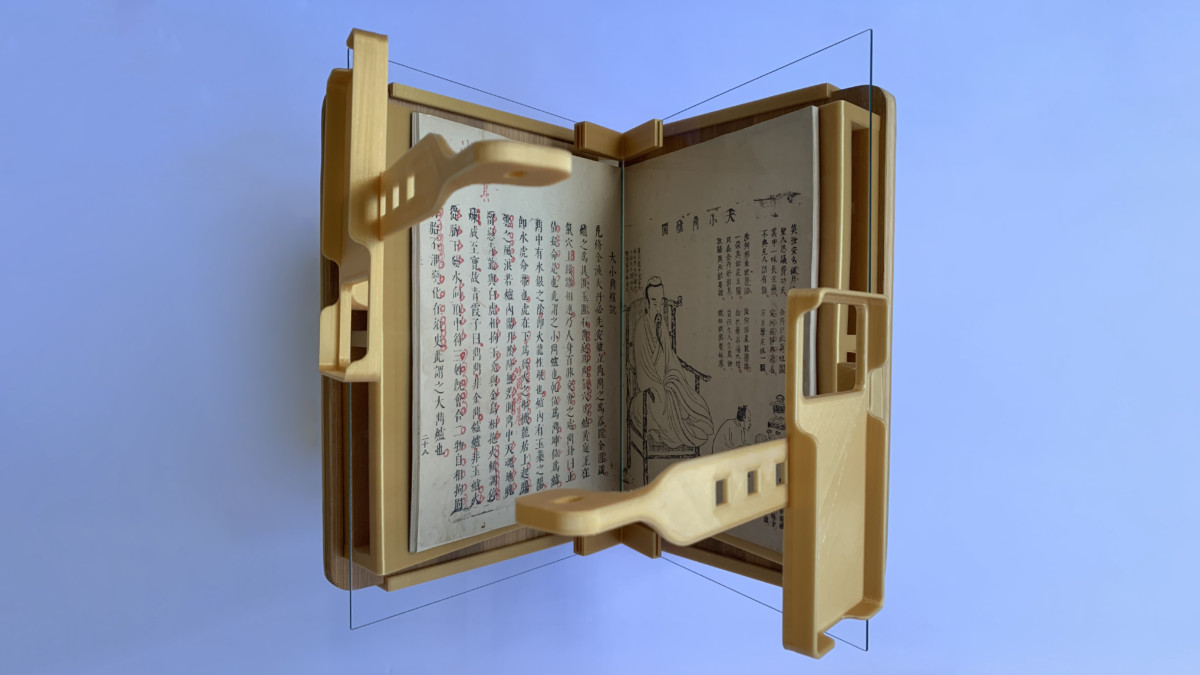
First Reviews of My Book Scanning Cradle
The project I spent most time designing last year was the book scanning frame I’m already selling at iBookBinding’s Etsy store. As it often happens, it started as an instrument I planned to use myself. However, It soon grew to be much more than that.
I’ve been working on the design since early summer last year. At that moment I started to gather more and more books about book arts and wanted to digitize some of them to share with the community.
First versions of the frame had some flaws. But when in August I reached version 1.5 of the project, the tool was good enough to be offered to other people. However, it took some time for the news about it to spread and the first customers have received what I consider to be versions 3.3 and higher. As you may imagine, there were lots of minor and major changes since the beginning! And it’s great that 3d-printing allows you to make smalles changes and test them with almost no effort.
That’s the thing with most of the tools I sell. I use them, and I cherish every opportunity to make them better. This time, however, I have also got a lot of feedback from one of the customers and I wanted to share it (with his permission), with you.
At the current moment, my book scanning frames are already delivered to customers on three continents, and I have inquiries from interested parties from Australia and South America as well. Hopefully, feedback from every new customer will allow making the future versions of the frame even better. However, it already seems to be quite good =)
First, here are some recent reviews from Etsy:
And here is another set sent to the US. This also was a custom order with an en;arged version of the frame that allows to scan books up to 28×36 cm in size:
Below I’d like to share with you one of the emails I received from one of the customers. His order had some additional items as well, to allow scanning books to be placed in the cradle opened not only at 90 degrees but also at a 70° angle. However, otherwise, the structure was the same.
Mr. Fu uses iPhone, so in contrast with my Samsung Galaxy S9, the camera is placed not on the central axis of the phone, but closer to one of the sides. In his letter, he described his way to use more of the camera’s field of view.
I used books of small and large sizes for the testing. With natural light at this point in time. I knew that using different brands of smartphones might end up with different results. Apps, operating systems and viewable size of a camera screen, all might not be the same.
Camera lens is placed near the side of my smartphone, so at first (see SIDE A from drawing A), I put smartphone holder closer to the left side in order to have holder’s opening at the centre position (camera lens was at the bottom from the phone). In that case the photo covers the whole page.
When turned around to SIDE B (drawing B1), camera lens was higher due to its positioning on the phone. Only half of the book (top side) can be seen horizontally.
Still working with the SIDE B (drawing B2), I turned the smartphone holder around in opposite direction. The opening of the holder moved closer to the right edge of the cradle with that orientation. And even while the camera lens was at the bottom this time, part of the book on the left side was not fitting to the image.
Based on the case from drawing B2, I moved smartphone holder horizontally to the left side (see drawing B3), it then became the similar to what’s happening on the drawing A. That way the full book was captured, as it was with the SIDE A.
As a result, B3 appears to be the best set up in case using iPhone XR. However, to fix the camera arms a long bolt with nuts may have to be used. Or a wire to “connect” both separated camera arms.
In order to have entire book showing in the centre from a phone’s camera screen (both sides), no matter what sizes of the books…
…I needed to place both camera arms and smartphone cases like the picture shown below:
Additionally, I used a Lazy Susan Turntable for my convenience to turn the cradle so that need not go to the other side:
I have some ancient books around the size of this cradle:
I can place paper boards to extend V shape cradle and might use a camera with tripod to photograph.Amazingly, we can turn design idea into a single 3D-printed product without a factory, so I am quite interested in design a new and slightly bigger cradle for those large sizes of books, maybe is based on a normal V shape cradle like yours or an upside-down V shape cradle like my own idea by using a tripod with camera, this can be considered as an extra version that merely wanted to turn dreams into reality, because current book holder is enough to use for most of my books. As such, maybe one day, would you like to help me construct and print it?
Once again, thank you for taking your time to build my customized extra parts.
So, I guess for iPhones and other smartphones with cameras placed closer to the side it may be reasonable to offer a set with four camera arms instead of two. For the time being, I just added an additional set of two spare arms to our Etsy shop.
I tried to assemble the frame with two pairs of camera arms as well. Here is how it looks like:
Just for the lulz, here is a short video of me using the frame. This was before I was advised to add Bluetooth shutter release remotes to the package. I had to use voice commands to take photos, to avoid motion blur.
You may find the frame at iBookBinding’s Etsy store here: https://www.etsy.com/listing/640747173/book-scanning-frame. As well as other items for bookbinders, like the most popular corner cutting jigs and sewing keys.
Please Support us on Patreon!
 The minimum level of contribution is only $1 per month.
Moreover, starting with the pledge level of $3, you will get a digitized vintage book about bookbinding, book history, or book arts each month from us!
These pledges help iBookBinding to continue its work and bring more information about bookbinding and book arts to you!


